

Key takeaways
- You can make a convincing DIY ugly Christmas sweater in one evening by starting with a plain or already-tacky sweater, planning a single loud theme.
You can make a convincing DIY ugly Christmas sweater in one evening by starting with a plain or already-tacky sweater, planning a single loud theme, and attaching every decoration with fabric glue or a few hand stitches. No sewing machine is required, and the sweater only needs to survive one party season, so speed beats perfection.
This guide is for anyone staging a 2026 sweater contest, an office swap or a family photo, and who would rather build something personal than buy a mass-produced design. The craft is forgiving: the uglier and more overloaded the result, the better it scores, so mistakes tend to become part of the joke.
Pick a Theme Before You Touch the Glue
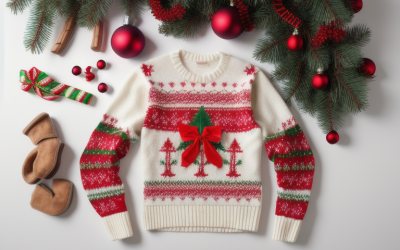
Random decorations look messy in a boring way. A theme looks messy on purpose, and that difference is what wins a contest. Pick one idea and commit to it: a snowman scene, a pizza-eating reindeer, a cat tangled in tinsel, a fireplace with stockings hanging from the hem, or a fake gift-wrapped torso with a giant bow at the neckline.
Sketch the layout on paper first. Mark where the chest focal point sits, where 3D pieces will hang, and which areas stay flat. Heavy items belong on the front and lower body, never at the cuffs or shoulders where they pull the knit out of shape.
Gather Your Materials
Most of what you need is already in a craft drawer or can be thrifted. Aim for contrast: shiny against fuzzy, flat against dimensional, and one clashing color you would never normally combine.
- A base sweater, sweatshirt or cardigan in a solid or lightly patterned knit
- Felt sheets in red, green, white and one wild accent color
- Pom-poms in several sizes, plus a few jingle bells
- Tinsel garland, ribbon and mini ornaments made of lightweight plastic
- Fabric glue, a hot glue gun, and a needle with strong thread
- Safety pins for temporary placement and pinned-on extras
- Scissors, chalk or a washable marker, and a piece of cardboard
Step-by-Step Build
Prep the Base
Wash and dry the sweater first so any shrinking happens before decorating. Slide a flattened piece of cardboard inside the body so glue cannot bleed through to the back layer. Lay the sweater flat and arrange every piece loosely before attaching anything, then take a quick photo so you can rebuild the layout if something shifts.
Cut and Attach the Flat Pieces
Cut your main shapes from felt, using chalk to outline them first. Felt does not fray, so rough edges are fine and even add to the homemade charm. Attach flat pieces with fabric glue and press them down for a full minute. Hot glue sets faster but can leave a stiff patch on thin knits, so use it sparingly on the front and keep fabric glue for large areas.
Add the Three-Dimensional Details
Now build upward. Sew on pom-pom noses, bell buttons and ribbon bows with a few loops of strong thread, which holds better than glue for anything that swings or gets bumped. Hang tinsel from the hem with safety pins on the inside so the effect dangles. Stack two or three layers on your focal point, such as a felt scarf over a pom-pom snowman, to create depth.
Test Light-Up and Sound Add-Ons
Battery-powered mini string lights are popular, but keep the battery pack in a small pocket sewn or pinned to the inside hem, away from skin, and switch the lights off when sitting down for a long time. Follow the maker’s instructions, never run wire through areas that will bend sharply, and remove the pack before any washing.
Quick Comparison of Attachment Methods
| Method | Best for | Drawback |
|---|---|---|
| Fabric glue | Large felt shapes and flat trim | Needs drying time and a flat surface |
| Hot glue | Quick bonding of small, lightweight items | Can stiffen thin knits and loosen with heat |
| Hand stitching | Bells, pom-poms and anything that dangles | Slower, takes patience |
| Safety pins | Tinsel, ribbon tails and removable extras | Pins can poke, so place them on the inside |
| Iron-on patches | Sturdy, stiff fabrics only | Heat can damage fuzzy or synthetic knits |
Before You Start Checklist
- Wash, dry and flatten the base sweater
- Choose one theme and sketch it on paper
- Lay out all pieces without glue and photograph the layout
- Insert cardboard inside the body to block glue bleed-through
- Plan where a battery pack, if any, will sit and how it comes out
- Give glue a full day to cure before wearing
Common Mistakes to Avoid
The most frequent problem is overloading the shoulders and sleeves with heavy items, which makes the sweater sag and ride up the neck. Keep the weight low and central. Another is gluing before arranging: once a piece is stuck to a knit it rarely comes off cleanly, so stay in the pinning stage longer than feels necessary.
Watch for scratchy elements too. Sequins, wire-edged ribbon and rough plastic ornaments can irritate skin through a thin sweater, so wear a long-sleeved shirt underneath. Finally, avoid hanging anything with small detachable parts if toddlers or pets will be climbing on you at the party.
Theme Ideas That Tend to Score Well
Contest judges and party guests respond to ideas they can read in two seconds. A few approaches reliably work because they combine a clear picture with one absurd twist.
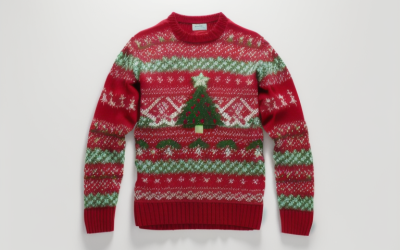
- The 3D Christmas tree: a felt tree on the chest with pom-pom ornaments, a star on the shoulder and a gift pile at the hem
- The snowman who gave up: a sagging felt snowman with a crooked carrot nose and a tiny scarf of real fabric
- Holiday food chaos: felt slices of pie, cookies and a turkey leg arranged as if they fell from the sky
- The pet takeover: your own cat or dog drawn in felt, tangled in lights and ribbon
- The mini scene: a fireplace, a window or a kitchen counter with stockings, mugs and a tiny tree
Whichever you choose, add a short text line using felt letters if you like puns. Keep the lettering large, since small words disappear on a busy knit and are hard to read from a few feet away.
Finishing Touches That Make It Look Intentional
Once the major pieces are attached, step back and look at the sweater from a few feet away. Large gaps, uneven balance and bare patches are easy to fix with a handful of extras. Scatter small pom-poms, sequin trim or a strip of tinsel along the cuffs and collar to frame the design and tie the sections together.
Trim loose threads, press down any edges that curl and check each pinned item from the inside. If something sags, add a second anchor point rather than more glue, since extra weight stresses the knit. Finally, put the sweater on and move around. Raise your arms, sit down and hug someone. Anything that snags, scratches or flops needs to be adjusted before the event, not during it.
Keep a mini repair kit in your bag for party night, with a small tube of fabric glue, a few safety pins and a needle with thread. Parties are rough on decorations, and a ninety-second fix is often all it takes to keep your sweater in the competition.
Related guides
- How To Hang Streamers And Backdrops Without Damaging Walls
- How To Fix A Christmas Light Strand That Is Half Out
- How To Wash A Light Up Ugly Christmas Sweater
Frequently Asked Questions
Can I make one without sewing at all?
Yes. Fabric glue, hot glue and safety pins cover nearly every element, and felt shapes bond well to most knits. Sewing only helps for heavier or dangling pieces that will see a lot of movement.
What is the best base for a DIY sweater?
A chunky solid-color knit or a plain sweatshirt gives the most room to decorate. Thrifted sweaters work well because you do not mind altering them, and an already-tacky pattern can become the foundation of your theme.
How long does the project take?
Plan on two to three hours of active work for a simple design, plus a day for glue to cure. Complex scenes with several 3D layers can stretch to an evening and a half.
Can the sweater be washed afterward?
Treat it as a spot-clean item. Glue and trim can loosen in a full wash cycle, so dab stains gently with a damp cloth and air dry. If you must wash it, remove any batteries and decorations that can come off first.
More from Amazon
Programs that pair well with the guide above. Offers and eligibility are set by Amazon and may change.
Send a Prime gift membership to someone who would use free shipping and Prime Video.
Gift Amazon PrimeGive audiobooks to someone who loves to listen. Plans and prices are set by Amazon.
Gift AudibleFree shipping on eligible items, Prime Video and more. Eligible new members can start with a free trial.
Start a Prime free trialAudiobooks and podcasts to listen to on the go. Eligible new members can start with a free trial.
Try Audible freeAs an Amazon Associate we earn from qualifying purchases.





Write Your Review
No reviews yet. Be the first to share your experience!